No edit summary |
(Fixed some spelling) Tag: Visual edit |
||
| (37 intermediate revisions by 11 users not shown) | |||
| Line 1: | Line 1: | ||
Managing a city provides a way to improve your chances in any game feature based on random chance. This random chance is often referred to as '''RNG''', Random Number Generator. |
Managing a city provides a way to improve your chances in any game feature based on random chance. This random chance is often referred to as '''RNG''', Random Number Generator. |
||
| + | |||
| + | The city is unlocked in the form of completing a mini-quest: |
||
| + | |||
| + | == Unlocking the city == |
||
| + | Once you reach a global level of 2500,you will find a voting ballot at your home. When you pick it up, it asks if you want to start collecting votes to become mayor. Hit yes, and you will get everyone's vote... |
||
| + | |||
| + | Except the shopkeeper, who says you'll just raise taxes. He then goes back and says you can bribe him for 5 billion coins to vote for him. |
||
| + | |||
| + | If you decline it, the chef and miner will praise you for doing the right thing. You won't get the shopkeeper's vote however, but the majority still voted for you. |
||
| + | |||
| + | If you accept it, I don't know what happens. Much like the choice in the animal rights quest on dh2, there are two choices you could make, but one is 10x easier then the other. |
||
| + | |||
| + | Either way, I'm guessing you are now mayor. |
||
| + | |||
| + | When you accept, your rng takes a hit. Your city is failing on your first day at work. Maybe it's the shopkeeper getting revenge. The only thing you can do is build a turbine. You can build multiple turbines actually. You need a population of 60 ( you start with 50) to build other stuff. |
||
| + | |||
| + | Once you build 2 turbines, your population will start to grow. |
||
== Ratings == |
== Ratings == |
||
| − | Your rating is influenced by how well you provide for the needs of your citizens. Each citizen needs 30 [[File: MayorElectricityResource.png|20px]], 1250 [[File: MayorWaterResource.png|20px]], 0.5 [[File: MayorEducationResourceIcon.png|20px]] and 3 [[File: MayorSecurityResource.png|20px]] |
+ | Your rating is influenced by pollution and how well you provide for the needs of your citizens. Each citizen needs 30 [[File: MayorElectricityResource.png|20px]], 1250 [[File: MayorWaterResource.png|20px]], 0.5 [[File: MayorEducationResourceIcon.png|20px]] and 3 [[File: MayorSecurityResource.png|20px]] |
{| class="article-table" |
{| class="article-table" |
||
| Line 10: | Line 27: | ||
|- |
|- |
||
|[[File: SadIcon.png|30px]] Bad |
|[[File: SadIcon.png|30px]] Bad |
||
| + | |<nowiki>-20%</nowiki> |
||
| ⚫ | |||
|- |
|- |
||
|[[File: NeutralIcon.png|30px]] Neutral |
|[[File: NeutralIcon.png|30px]] Neutral |
||
| Line 23: | Line 40: | ||
== Buildings == |
== Buildings == |
||
| + | <tabber> |
||
| − | |||
| + | Electricity= |
||
{| class="article-table" |
{| class="article-table" |
||
|- |
|- |
||
| Line 34: | Line 52: | ||
|- |
|- |
||
| [[File: Turbine.png|50px]]<br />Turbine |
| [[File: Turbine.png|50px]]<br />Turbine |
||
| − | | [[File: |
+ | | [[File: SilverBars.png|20px]] 5,000 |
| +500,000 Crafting XP |
| +500,000 Crafting XP |
||
| [[File: MayorElectricityResource.png|20px]] 100 kWh |
| [[File: MayorElectricityResource.png|20px]] 100 kWh |
||
| [[File: PollutionIcon.png|20px]] No pollution |
| [[File: PollutionIcon.png|20px]] No pollution |
||
| ⚫ | |||
| − | |Time: 5 minutes |
||
|- |
|- |
||
| [[File: Powerplant.png|50px]]<br />Powerplant |
| [[File: Powerplant.png|50px]]<br />Powerplant |
||
| Line 46: | Line 64: | ||
| [[File: MayorElectricityResource.png|20px]] 500 kWh |
| [[File: MayorElectricityResource.png|20px]] 500 kWh |
||
| [[File: PollutionIcon.png|20px]] Medium pollution (7%) |
| [[File: PollutionIcon.png|20px]] Medium pollution (7%) |
||
| − | |Unlocked at 60 population |
+ | | Unlocked at 60 population |
| + | [[File:Clock white.png|20px]] 10:00 |
||
| − | Time: 10 minutes |
||
|- |
|- |
||
| − | |[[File: OilPowerplant.png|50px]]<br />Oil Powerplant |
+ | | [[File: OilPowerplant.png|50px]]<br />Oil Powerplant |
| − | |[[File: IronBars.png|20px]] 8,000 |
+ | | [[File: IronBars.png|20px]] 8,000 |
[[File: GoldBars.png|20px]] 3,000<br />[[File: Oil_lighter.png|20px]] 1,000,000 |
[[File: GoldBars.png|20px]] 3,000<br />[[File: Oil_lighter.png|20px]] 1,000,000 |
||
| − | | |
+ | | +555,000 Crafting XP |
| − | |[[File: MayorElectricityResource.png|20px]] 2,000 kWh |
+ | | [[File: MayorElectricityResource.png|20px]] 2,000 kWh |
| − | |[[File: PollutionIcon.png|20px]] High pollution (14%) |
+ | | [[File: PollutionIcon.png|20px]] High pollution (14%) |
| − | |Unlocked at 100 population |
+ | | Unlocked at 100 population |
| + | [[File:Clock white.png|20px]] 30:00 |
||
| − | Time: 30 minutes |
||
|- |
|- |
||
| [[File: SolarFarm.png|50px]]<br />Solar Farm |
| [[File: SolarFarm.png|50px]]<br />Solar Farm |
||
| [[File: SilverBars.png|20px]] 10,000 |
| [[File: SilverBars.png|20px]] 10,000 |
||
[[File: PromethiumBars.png|20px]] 250 |
[[File: PromethiumBars.png|20px]] 250 |
||
| + | | <nowiki>+1,200,000 Crafting XP</nowiki> |
||
| ⚫ | |||
| [[File: MayorElectricityResource.png|20px]] 1,500 kWh |
| [[File: MayorElectricityResource.png|20px]] 1,500 kWh |
||
| [[File: PollutionIcon.png|20px]] No pollution |
| [[File: PollutionIcon.png|20px]] No pollution |
||
| − | |Unlocked at 290 population |
+ | | Unlocked at 290 population |
| + | [[File:Clock white.png|20px]] 3:00:00 |
||
| ⚫ | |||
| ⚫ | |||
| + | | [[File: RedwoodLogs.png|20px]] 10,000 |
||
| + | [[File: Powerlines.png|20px]] 1 |
||
| ⚫ | |||
| + | |[[File: MayorElectricityResource.png|20px]] 0* kWh |
||
| + | | [[File: PollutionIcon.png|20px]] No pollution |
||
| + | | Unlocked at 1900 population |
||
| + | [[File:Clock white.png|20px]] 8:00:00 |
||
| + | |||
| + | [[File: CraftingSkill.png|20px]] Level 870 |
||
| + | |||
| + | Increases your current powerlines from double to triple |
||
| ⚫ | |||
| + | |-| |
||
| + | Water= |
||
| + | {| class="article-table" |
||
| ⚫ | |||
| + | ! scope="col" |Building |
||
| + | ! scope="col" width="100px"|Cost |
||
| + | ! scope="col" |Experience |
||
| + | ! scope="col" |Resource |
||
| + | ! scope="col" |Pollution |
||
| + | !Notes |
||
|- |
|- |
||
| [[File: WaterPiping.png|50px]]<br />Water Pipe |
| [[File: WaterPiping.png|50px]]<br />Water Pipe |
||
| Line 71: | Line 114: | ||
| [[File: MayorWaterResource.png|20px]] 100L |
| [[File: MayorWaterResource.png|20px]] 100L |
||
| [[File: PollutionIcon.png|20px]] No pollution |
| [[File: PollutionIcon.png|20px]] No pollution |
||
| − | |Unlocked at 200 kWh + 65 population |
+ | | Unlocked at 200 kWh + 65 population |
| − | Time: instant |
||
|- |
|- |
||
| [[File: WaterTower.png|50px]]<br />Water Tower |
| [[File: WaterTower.png|50px]]<br />Water Tower |
||
| Line 79: | Line 121: | ||
| [[File: MayorWaterResource.png|20px]] 30,000L |
| [[File: MayorWaterResource.png|20px]] 30,000L |
||
| [[File: PollutionIcon.png|20px]] No pollution |
| [[File: PollutionIcon.png|20px]] No pollution |
||
| − | |Unlocked at 200 kWh + 65 population |
+ | | Unlocked at 200 kWh + 65 population |
| + | [[File:Clock white.png|20px]] 5:00 |
||
| − | Time: 5 minutes |
||
|- |
|- |
||
| [[File: WaterFilteringPlant.png|50px]]<br />Water Filtering Plant |
| [[File: WaterFilteringPlant.png|50px]]<br />Water Filtering Plant |
||
| Line 87: | Line 129: | ||
| [[File: MayorWaterResource.png|20px]] 100,000L |
| [[File: MayorWaterResource.png|20px]] 100,000L |
||
| [[File: PollutionIcon.png|20px]] No pollution |
| [[File: PollutionIcon.png|20px]] No pollution |
||
| − | |Unlocked at 110 population |
+ | | Unlocked at 110 population |
| + | [[File:Clock white.png|20px]] 30:00 |
||
| − | Time: 30 minutes |
||
|- |
|- |
||
| [[File: waterFilteringMove.png|50px]]<br />Move Water Plant |
| [[File: waterFilteringMove.png|50px]]<br />Move Water Plant |
||
| Line 96: | Line 138: | ||
| [[File: MayorWaterResource.png|20px]] 250,000L |
| [[File: MayorWaterResource.png|20px]] 250,000L |
||
| [[File: PollutionIcon.png|20px]] No pollution |
| [[File: PollutionIcon.png|20px]] No pollution |
||
| − | |Unlocked at 510 population |
+ | | Unlocked at 510 population |
You move all 5 water plants at once |
You move all 5 water plants at once |
||
| ⚫ | |||
| + | | [[File:WaterPipingValves.png|50px]]<br />Pipe Valves |
||
| + | | [[File:IronBars.png|20px]] 80,000 |
||
| + | [[File:SilverBars.png|20px]] 70,000 |
||
| + | | +750,000 Crafting XP |
||
| + | | [[File: MayorWaterResource.png|20px]] 300,000L |
||
| + | | [[File: PollutionIcon.png|20px]] No pollution |
||
| + | | Unlocked at 950 population |
||
| ⚫ | |||
| + | |-| |
||
| + | Education= |
||
| + | {| class="article-table" |
||
| + | |- |
||
| + | ! scope="col" |Building |
||
| + | ! scope="col" width="100px"|Cost |
||
| + | ! scope="col" |Experience |
||
| + | ! scope="col" |Resource |
||
| + | ! scope="col" |Pollution |
||
| + | !Notes |
||
|- |
|- |
||
| [[File: ElementarySchool.png|50px]]<br />Elementary School |
| [[File: ElementarySchool.png|50px]]<br />Elementary School |
||
| Line 105: | Line 166: | ||
| [[File: MayorEducationResourceIcon.png|20px]] 100 Seats |
| [[File: MayorEducationResourceIcon.png|20px]] 100 Seats |
||
| [[File: PollutionIcon.png|20px]] No pollution |
| [[File: PollutionIcon.png|20px]] No pollution |
||
| − | |Unlocked at 90,000L + 110 population |
+ | | Unlocked at 90,000L + 110 population |
| + | [[File:Clock white.png|20px]] 20:00 |
||
| − | Time: 20 minutes |
||
|- |
|- |
||
| [[File:Highschool.png|50px]]<br />High School |
| [[File:Highschool.png|50px]]<br />High School |
||
| [[File:SilverBars.png|20px]] 20,000 |
| [[File:SilverBars.png|20px]] 20,000 |
||
[[File:PromethiumBars.png|20px]] 500 |
[[File:PromethiumBars.png|20px]] 500 |
||
| + | | +1,560,000 Crafting XP |
||
| − | | some xp |
||
| [[File: MayorEducationResourceIcon.png|20px]] 200 Seats |
| [[File: MayorEducationResourceIcon.png|20px]] 200 Seats |
||
| [[File: PollutionIcon.png|20px]] No pollution |
| [[File: PollutionIcon.png|20px]] No pollution |
||
| − | |Unlocked at 750 population |
+ | | Unlocked at 750 population |
|- |
|- |
||
| + | |} |
||
| ⚫ | |||
| + | |-| |
||
| ⚫ | |||
| + | Service= |
||
| + | {| class="article-table" |
||
| + | |- |
||
| + | ! scope="col" |Building |
||
| + | ! scope="col" width="100px"|Cost |
||
| + | ! scope="col" |Experience |
||
| + | ! scope="col" |Resource |
||
| + | ! scope="col" |Pollution |
||
| + | !Notes |
||
| + | |- |
||
| + | | [[File: FireStation.png|50px]]<br />Fire station |
||
| + | | [[File: IronBars.png|20px]]10,000 |
||
[[File: GoldBars.png|20px]] 2,000<br />[[File: PromethiumBars.png|20px]] 75 |
[[File: GoldBars.png|20px]] 2,000<br />[[File: PromethiumBars.png|20px]] 75 |
||
| − | |<nowiki>+580,000 Crafting XP</nowiki> |
+ | | <nowiki>+580,000 Crafting XP</nowiki> |
| − | |[[File: MayorSecurityResource.png|20px]] 50 Services |
+ | | [[File: MayorSecurityResource.png|20px]] 50 Services |
| − | |[[File: PollutionIcon.png|20px]] No pollution |
+ | | [[File: PollutionIcon.png|20px]] No pollution |
| − | |Unlocked at 100 Seats + 80 population |
+ | | Unlocked at 100 Seats + 80 population |
| + | [[File:Clock white.png|20px]] 10:00 |
||
| − | Time: 10 minutes |
||
|- |
|- |
||
| − | |[[File: PoliceStation.png|50px]]<br />Police station |
+ | | [[File: PoliceStation.png|50px]]<br />Police station |
| − | |[[File: BronzeBars.png|20px]]10,000 |
+ | | [[File: BronzeBars.png|20px]]10,000 |
[[File: SilverBars.png|20px]]10,000 |
[[File: SilverBars.png|20px]]10,000 |
||
| − | |<nowiki>+580,000 Crafting XP</nowiki> |
+ | | <nowiki>+580,000 Crafting XP</nowiki> |
| − | |[[File: MayorSecurityResource.png|20px]] 75 Services |
+ | | [[File: MayorSecurityResource.png|20px]] 75 Services |
| − | |[[File: PollutionIcon.png|20px]] No pollution |
+ | | [[File: PollutionIcon.png|20px]] No pollution |
| − | |Unlocked at 95 population |
+ | | Unlocked at 95 population |
| + | [[File:Clock white.png|20px]] 10:00 |
||
| − | Time: 10 minutes |
||
|+ |
|+ |
||
| [[File: Clinic.png|50px]]<br />Clinic |
| [[File: Clinic.png|50px]]<br />Clinic |
||
| [[File: IronBars.png|20px]]20,000 |
| [[File: IronBars.png|20px]]20,000 |
||
[[File: GoldBars.png|20px]] 8,000 |
[[File: GoldBars.png|20px]] 8,000 |
||
| + | |<nowiki>+650,000 Crafting XP</nowiki> |
||
| ⚫ | |||
| [[File: MayorSecurityResource.png|20px]] 90 Services |
| [[File: MayorSecurityResource.png|20px]] 90 Services |
||
| [[File: PollutionIcon.png|20px]] No pollution |
| [[File: PollutionIcon.png|20px]] No pollution |
||
|Unlocked at 165 population |
|Unlocked at 165 population |
||
| + | [[File:Clock white.png|20px]] 1:00:00 |
||
|- |
|- |
||
| [[File: Prison.png|50px]]<br />Prison |
| [[File: Prison.png|50px]]<br />Prison |
||
| [[File: BronzeBars.png|20px]] 20,000 |
| [[File: BronzeBars.png|20px]] 20,000 |
||
[[File: PromethiumBars.png|20px]] 200 |
[[File: PromethiumBars.png|20px]] 200 |
||
| + | |<nowiki>+1,600,000 Crafting XP</nowiki> |
||
| ⚫ | |||
| [[File: MayorSecurityResource.png|20px]] 100 Services |
| [[File: MayorSecurityResource.png|20px]] 100 Services |
||
| [[File: PollutionIcon.png|20px]] No pollution |
| [[File: PollutionIcon.png|20px]] No pollution |
||
| + | |Unlocked at 350 population |
||
| ⚫ | |||
| + | [[File:Clock white.png|20px]] 3:00:00 |
||
|- |
|- |
||
| [[File: Museum.png|50px]]<br />Museum |
| [[File: Museum.png|50px]]<br />Museum |
||
| Line 155: | Line 230: | ||
[[File: HauntedPainting.png|20px]] 1 |
[[File: HauntedPainting.png|20px]] 1 |
||
| |
| |
||
| − | | [[File: MayorSecurityResource.png|20px]] 0 Services |
+ | | [[File: MayorSecurityResource.png|20px]] 0* Services |
| [[File: PollutionIcon.png|20px]] No pollution |
| [[File: PollutionIcon.png|20px]] No pollution |
||
| + | |Unlocked at 520 population |
||
| − | + | <nowiki>*</nowiki>You upgrade it with the rarest artifact from each zone, giving 100 services per zone |
|
| ⚫ | |||
| + | |- |
||
| + | | [[File: PoliceHeadquarters.png|50px]]<br />Police headquarters |
||
| + | | [[File: SilverBars.png|20px]]10,000 |
||
| + | [[File: PromethiumBars.png|20px]]900 |
||
| + | | |
||
| + | | [[File: MayorSecurityResource.png|20px]] 500 Services |
||
| + | | [[File: PollutionIcon.png|20px]] No pollution |
||
| + | | Unlocked at 1050 population |
||
| + | [[File: CraftingSkill.png|20px]] Level 870 |
||
| + | [[File:Clock white.png|20px]] 3:00:00 |
||
| + | |} |
||
| + | </tabber> |
||
== Services == |
== Services == |
||
Unlocked at some point around first time when water demand is covered. |
Unlocked at some point around first time when water demand is covered. |
||
| Line 190: | Line 277: | ||
|[[File: Coins.png|20px]] 4,2 |
|[[File: Coins.png|20px]] 4,2 |
||
|Increases power output by 50%. |
|Increases power output by 50%. |
||
| + | |- |
||
| + | |Police Staff |
||
| + | |[[File: Coins.png|20px]] 4,4 |
||
| + | |Doubles the staff for all police stations. |
||
|- |
|- |
||
|Promote Education |
|Promote Education |
||
| Line 214: | Line 305: | ||
| [[File: Bulldozer.png|50px]] Bulldozer |
| [[File: Bulldozer.png|50px]] Bulldozer |
||
| [[File: Coins.png|20px]] 800,000,000 |
| [[File: Coins.png|20px]] 800,000,000 |
||
| − | | Unlocked at |
+ | | Unlocked at 290 population |
Allows you to destroy buildings |
Allows you to destroy buildings |
||
|- |
|- |
||
| [[File: Parks.png|50px]] Parks |
| [[File: Parks.png|50px]] Parks |
||
| [[File: Coins.png|20px]] 1,900M |
| [[File: Coins.png|20px]] 1,900M |
||
| + | | Unlocked at 350 population |
||
| ⚫ | |||
| + | Requires 750 Farming level |
||
| + | |||
| ⚫ | |||
|- |
|- |
||
| [[File: NewServiceElectricityBoost.png|50px]] New Service |
| [[File: NewServiceElectricityBoost.png|50px]] New Service |
||
| [[File: Coins.png|20px]] 2,100M |
| [[File: Coins.png|20px]] 2,100M |
||
| + | | Unlocked at 400 population |
||
| − | + | Unlocks new service named Power Boost |
|
|- |
|- |
||
| − | | [[File: MoreLand1.png|50px]] Land |
+ | | [[File: MoreLand1.png|50px]] Land Lv.1 |
| [[File: Coins.png|20px]] 12B |
| [[File: Coins.png|20px]] 12B |
||
| − | | |
+ | | Unlocked at 500 population |
| + | Unlocks more land increasing your population cap |
||
|- |
|- |
||
| [[File: Powerlines.png|50px]] Powerlines |
| [[File: Powerlines.png|50px]] Powerlines |
||
| [[File: Coins.png|20px]] 1,500M |
| [[File: Coins.png|20px]] 1,500M |
||
| Doubles your power output |
| Doubles your power output |
||
| + | |- |
||
| + | | [[File:MayorUniqueBookKeeping.png|50px]] Book Keeping |
||
| + | | [[File: Coins.png|20px]] 1,000,000 |
||
| + | |Unlocked at 150 population |
||
| + | Gives players mayor points according to mayor rating |
||
| + | |- |
||
| + | | [[File: MoreLand1.png|50px]] Land Lv.2 |
||
| + | | [[File: Coins.png|20px]] 50B |
||
| + | | Unlocks even more land increasing your population cap |
||
| + | |- |
||
| + | | [[File:ExtraService.png|50px]] More Services |
||
| + | | [[File: Coins.png|20px]] 1,000,000 |
||
| + | |Unlocked at 200 population |
||
| + | You may now run up to 3 services at a time. |
||
| + | |- |
||
| + | | [[File:CityWalls.png|50px]] City Walls |
||
| + | | [[File: Coins.png|20px]] 10B |
||
| + | | Ability to control the flow of population. |
||
| + | Unlocked (around) 1,000 population. |
||
|} |
|} |
||
| + | Notes: |
||
| + | |||
| + | Apperently, the thief from the woods, and the gem goblin vote for you too, even though you may have killed countless of each. |
||
| + | [[Category:Mechanics]] |
||
Revision as of 16:27, 27 April 2020
Managing a city provides a way to improve your chances in any game feature based on random chance. This random chance is often referred to as RNG, Random Number Generator.
The city is unlocked in the form of completing a mini-quest:
Unlocking the city
Once you reach a global level of 2500,you will find a voting ballot at your home. When you pick it up, it asks if you want to start collecting votes to become mayor. Hit yes, and you will get everyone's vote...
Except the shopkeeper, who says you'll just raise taxes. He then goes back and says you can bribe him for 5 billion coins to vote for him.
If you decline it, the chef and miner will praise you for doing the right thing. You won't get the shopkeeper's vote however, but the majority still voted for you.
If you accept it, I don't know what happens. Much like the choice in the animal rights quest on dh2, there are two choices you could make, but one is 10x easier then the other.
Either way, I'm guessing you are now mayor.
When you accept, your rng takes a hit. Your city is failing on your first day at work. Maybe it's the shopkeeper getting revenge. The only thing you can do is build a turbine. You can build multiple turbines actually. You need a population of 60 ( you start with 50) to build other stuff.
Once you build 2 turbines, your population will start to grow.
Ratings
Your rating is influenced by pollution and how well you provide for the needs of your citizens. Each citizen needs 30 ![]() , 1250
, 1250 ![]() , 0.5
, 0.5 ![]() and 3
and 3 ![]()
| Rating | Effect on RNG |
|---|---|
| -20% | |
| 0% | |
| +15% | |
| +25% |
Buildings
| Building | Cost | Experience | Resource | Pollution | Notes |
|---|---|---|---|---|---|
 Turbine |
+500,000 Crafting XP | ||||
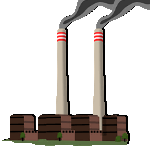 Powerplant |
|
+525,000 Crafting XP | Unlocked at 60 population
| ||
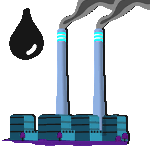 Oil Powerplant |
|
+555,000 Crafting XP | Unlocked at 100 population
| ||
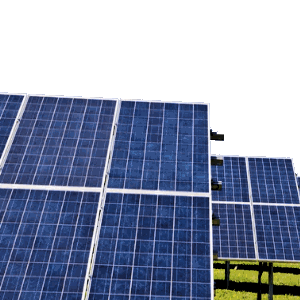 Solar Farm |
|
+1,200,000 Crafting XP | Unlocked at 290 population
| ||
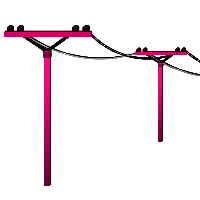 Powerlines+ |
|
Unlocked at 1900 population
Increases your current powerlines from double to triple |
| Building | Cost | Experience | Resource | Pollution | Notes |
|---|---|---|---|---|---|
 Water Pipe |
+100 Crafting XP | Unlocked at 200 kWh + 65 population | |||
 Water Tower |
+545,000 Crafting XP | Unlocked at 200 kWh + 65 population
| |||
 Water Filtering Plant |
+585,000 Crafting XP | Unlocked at 110 population
| |||
 Move Water Plant |
|
Unlocked at 510 population
You move all 5 water plants at once | |||
 Pipe Valves |
|
+750,000 Crafting XP | Unlocked at 950 population |
| Building | Cost | Experience | Resource | Pollution | Notes |
|---|---|---|---|---|---|
 Elementary School |
|
+560,000 Crafting XP | Unlocked at 90,000L + 110 population
| ||
 High School |
|
+1,560,000 Crafting XP | Unlocked at 750 population |
| Building | Cost | Experience | Resource | Pollution | Notes |
|---|---|---|---|---|---|
 Fire station |
|
+580,000 Crafting XP | Unlocked at 100 Seats + 80 population
| ||
 Police station |
|
+580,000 Crafting XP | Unlocked at 95 population
|
||
 Clinic |
|
+650,000 Crafting XP | Unlocked at 165 population
| ||
 Prison |
|
+1,600,000 Crafting XP | Unlocked at 350 population
| ||
 Museum |
|
Unlocked at 520 population
*You upgrade it with the rarest artifact from each zone, giving 100 services per zone | |||
 Police headquarters |
|
Unlocked at 1050 population
|
Services
Unlocked at some point around first time when water demand is covered.
Activate some services, starting with 2 of them at the same time. You can toggle on and off when you want.
Each service have some buff related with the City Management and the cost is money per second and person (population), for example, if you use Clean Energy (cost 0,6) and have a population of 500, the operation is:
Cost X Population = coins per second
So you spent 0,6 * 500 = 300 coins per second to run this service
| Name | Cost | Notes |
|---|---|---|
| Clean Energy | Reduces the pollution produced from power plants by 50% | |
| Efficient Piping | Hire engineers to better design your water pipes, tripling the volume limit per pipe. | |
| Free Medicare | Increases the population's global happiness. | |
| Power Boost | Increases power output by 50%. | |
| Police Staff | Doubles the staff for all police stations. | |
| Promote Education | Increases the population's global happiness at the expense of requiring more educational faculties. | |
| Lower Taxes | Increases the population's global happiness. | |
| Publicity | Increase population gain by 300% |
Uniques
Unlocked on either Services 300+ or first time basic needs are covered (Electricity, Water, Education, Services)
| Name | Cost | Effect |
|---|---|---|
 Bulldozer Bulldozer
|
Unlocked at 290 population
Allows you to destroy buildings | |
 Parks Parks
|
Unlocked at 350 population
Requires 750 Farming level Add parks to your village increasing global happiness | |
 New Service New Service
|
Unlocked at 400 population
Unlocks new service named Power Boost | |
 Land Lv.1 Land Lv.1
|
Unlocked at 500 population
Unlocks more land increasing your population cap | |
 Powerlines Powerlines
|
Doubles your power output | |
 Book Keeping Book Keeping
|
Unlocked at 150 population
Gives players mayor points according to mayor rating | |
| Land Lv.2
|
Unlocks even more land increasing your population cap | |
 More Services More Services
|
Unlocked at 200 population
You may now run up to 3 services at a time. | |
 City Walls City Walls
|
Ability to control the flow of population.
Unlocked (around) 1,000 population. |
Notes:
Apperently, the thief from the woods, and the gem goblin vote for you too, even though you may have killed countless of each.